If you are curious about fermenting or want to start fermenting foods at home, sauerkraut is a great entry-level project. It is very easy and doesn’t take much time or special equipment. It is also a very fun ferment that you can experiment with and try new flavor combinations easily.
Sauerkraut is a dry salting method of brining. That means that you don’t add any water to it since it makes its own brine from the liquid that is already present in the cabbage. The salt and pounding or squeezing will make all of the liquid so that is one less thing to measure!

Equipment:
- 1 Quart Jar or 2 Pint Jars
- Lid or Lids
- Large mixing bowl
- Chef’s Knife or a similar large knife
- Box grater or Food Processor (Optional)
- Weights (Optional)
- Scale (Optional)
- Kraut Pounder or Pickle Packer (Optional)
- Airlocks, vents, or Pickle Pipes (Optional)
Ingredients:
- 1 Head Cabbage (Any type or color – Approximately 2 lbs)
- 1 Tablespoon Non-iodized Salt
- 1-2 Bay Leaves (The tannins help keep it crisp)
- Other spices (Optional – Traditional German ingredients below)
- Caraway Seed
- Celery Seed
- Black Peppercorns
- Garlic
Method:
I prefer to weigh out my ingredients so that I can get a precise concentration of salt for my sauerkraut and all of my ferments. Doing this I have never had any fail or mold. I find doing it this way is just as easy and quick as just measuring it by volume but it is much more exact and easily replicated from batch to batch. If you don’t have scales or don’t want to use them this is a recipe that you can easily get away with just adding 1 tablespoon per head of cabbage. The desired salinity or concentration for kraut is anywhere from 1.5% to 3% so it is very forgiving.
I have several types of salt in my kitchen, from very fine canning and pickling salt to very coarse sea salt. I weighed the salts in my kitchen and found that they weigh anywhere from 6 grams per tablespoon to 16 grams per tablespoon so that is a huge difference in the amount of salt you are adding.
There is one thing that is crucial about your salt!
The salt cannot be iodized, the iodine inhibits the growth of the lactobacillus (good bacteria) and you will essentially be rotting cabbage. You also need to see if there are anti-caking agents added as well, you want 100% salt .
By Volume:
- Quarter the cabbage
- Remove the stem (It will actually ferment fine but isn’t very pleasant to eat due to texture)

- Rinse Cabbage and discard any questionable leaves – especially black or brown spots
- Set aside a couple of the outermost unblemished leaves (These can be used to keep it submerged and work with or without weights)
- Place a quarter on your cutting board and slice against the grain keeping the strips fairly small or shredded
- You can use a box grater or food processor for this if you want but I prefer a knife ( I like to control the size manually)
- When each quarter of cabbage is shredded toss it in your bowl and add a bit of your salt if you aren’t going by weight (1 teaspoon of the tablespoon or something like that, no need for precision)
- When all of the cabbage is in the bowl toss it together with the salt
- The cabbage may swell up
- You will notice bubbles
- You will be able to smell a sulfurous sauerkraut smell when opened
- You may see some sediment at the bottom of the jar (It is beneficial, good yeast and no cause for alarm)
- Allow to ferment until the taste and texture is to your liking
- This can be as little as 4-5 days for some people and 6 weeks for others. The sauerkraut will continue to get stronger in flavor and the texture will get softer the longer that you allow it to ferment
- When it is ready to your taste, place a non-reactive lid on the jar and store it in your refrigerator for up to a year ( I believe this is possible, mine has never lasted that long due to constant consumption)

- Cover with a towel and let sit to macerate for 15 minutes or so
- Using your hands squeeze it all together and press down in the bowl until it is covered by liquid when you press down (This can also be done with a rolling pin, Kraut Pounder, or Pickle Packer which is quite a bit easier for most people)
- If you get tired of pounding, squeezing, and smashing cover with a towel and allow it to macerate for 20-30 minutes again

- Once it has released enough liquid, it is time to pack the jar
- Add a couple of handfuls and then pack it down firmly
- Add some if the optional spices as you go if desired in between packing
- Repeat the above process until the jar(s) is(are) almost full, leaving about an inch of head-space or to the shoulder of the jar (If you fill it too full, in a few days you will have problems. If you are using vent lids you will be treated to kraut juice being expelled in a manner similar to when cold air hits a baby when you remove their diaper!)
- Cut one of the cabbage leaves that you sat aside earlier to the width of the jar
- Cover the loose cabbage with it and press down to make sure that it is covered in brine (This will stop mold growth)

- Now you need to weigh it down and this can be accomplished in a few ways
- A fermenting weight
- A plastic baggie filled with brine (1 teaspoon for 2 cups of water in case it leaks)
- A clean stone (Yes, you can really use a rock if you wash it)
- A plastic cup cut down to about 3/4 of an inch in height with some holes in it

- Cover the jar – This can be done a few ways
- Pickle Pipe or airlock (This is how I do it. It allows CO2 to escape and stops oxygen and mold from getting in)
- Canning ring and lid (This works well but you need to burp or vent the jar a couple of times per day when it is really actively fermenting)
- Cheesecloth or coffee filter and rubber bands (Not how I do it but it is effective)

Kraut with Pickle Pipe Ready to Ferment 
Pickle Pipes 
Pickle Pipe on Jar
- Place something under the jar to catch any liquid that may leak out of the vent or when venting/burping
- Store the jar somewhere to ferment at room temperature (I have read that is has to be dark – I don’t think it matters, I have done it both ways)
- After 2-3 days you will be able to observe some changes
- The cabbage may swell up
- You will notice bubbles
- You will be able to smell a sulfurous sauerkraut smell when opened
- You may see some sediment at the bottom of the jar (It is beneficial, good yeast and no cause for alarm)
- Allow to ferment until the taste and texture is to your liking
- This can be as little as 4-5 days for some people and 6 weeks for others. The sauerkraut will continue to get stronger in flavor and the texture will get softer the longer that you allow it to ferment
- When it is ready to your taste, place a non-reactive lid on the jar and store it in your refrigerator for 6 months to a year ( I believe this is possible, mine has never lasted that long due to constant consumption)
By Weight: (More precise and just as easy)

Instead of adding the salt as you go you can add it all at one time like in the graphic above
All of the other steps are the same
- Place your bowl on your scale and tare or zero it out
- Cut up the cabbage
- Add the cabbage to your bowl and get the weight of the cabbage
- Multiply the weight of the cabbage by 1.02 and write down your result
- Add salt slowly until the weight reaches the amount you recorded
- Voila! exactly 2% salt by weight!
Troubleshooting:
- My brine isn’t covering the cabbage – even after pounding, leakage from overfilling, after a few days, etc.
- You can add some more brine to the kraut in a ratio of 1/2 teaspoon to 2 cups of water to keep it below the waterline.
- There is white sediment at the bottom of the jar.
- This is natural yeast and beneficial bacteria, no cause for concern.
- My sauerkraut is bubbling.
- This is the fermentation at work, you want this to happen!
- My sauerkraut changed color and isn’t bright green anymore.
- It will typically turn a darker and less vibrant color as it ferments, there is no need for alarm.
- There is a white substance on top.
- This can be one of a couple of things, yeast or mold. You can get rid of it with this simple technique:
- Put the jar in your sink
- Prepare a brine of 1/2 teaspoon of salt to water
- Pour the brine slowly into the top of the jar and the yeast or mold will wash away when it flows over the top
- Be sure to pour enough out to leave head-space but keep enough brine to keep the cabbage below the waterline.
- My sauerkraut stinks!
- If it smells like sulfur, this is normal and nothing to worry about.
- If it smells rotten, throw it out. Cabbage is cheap!
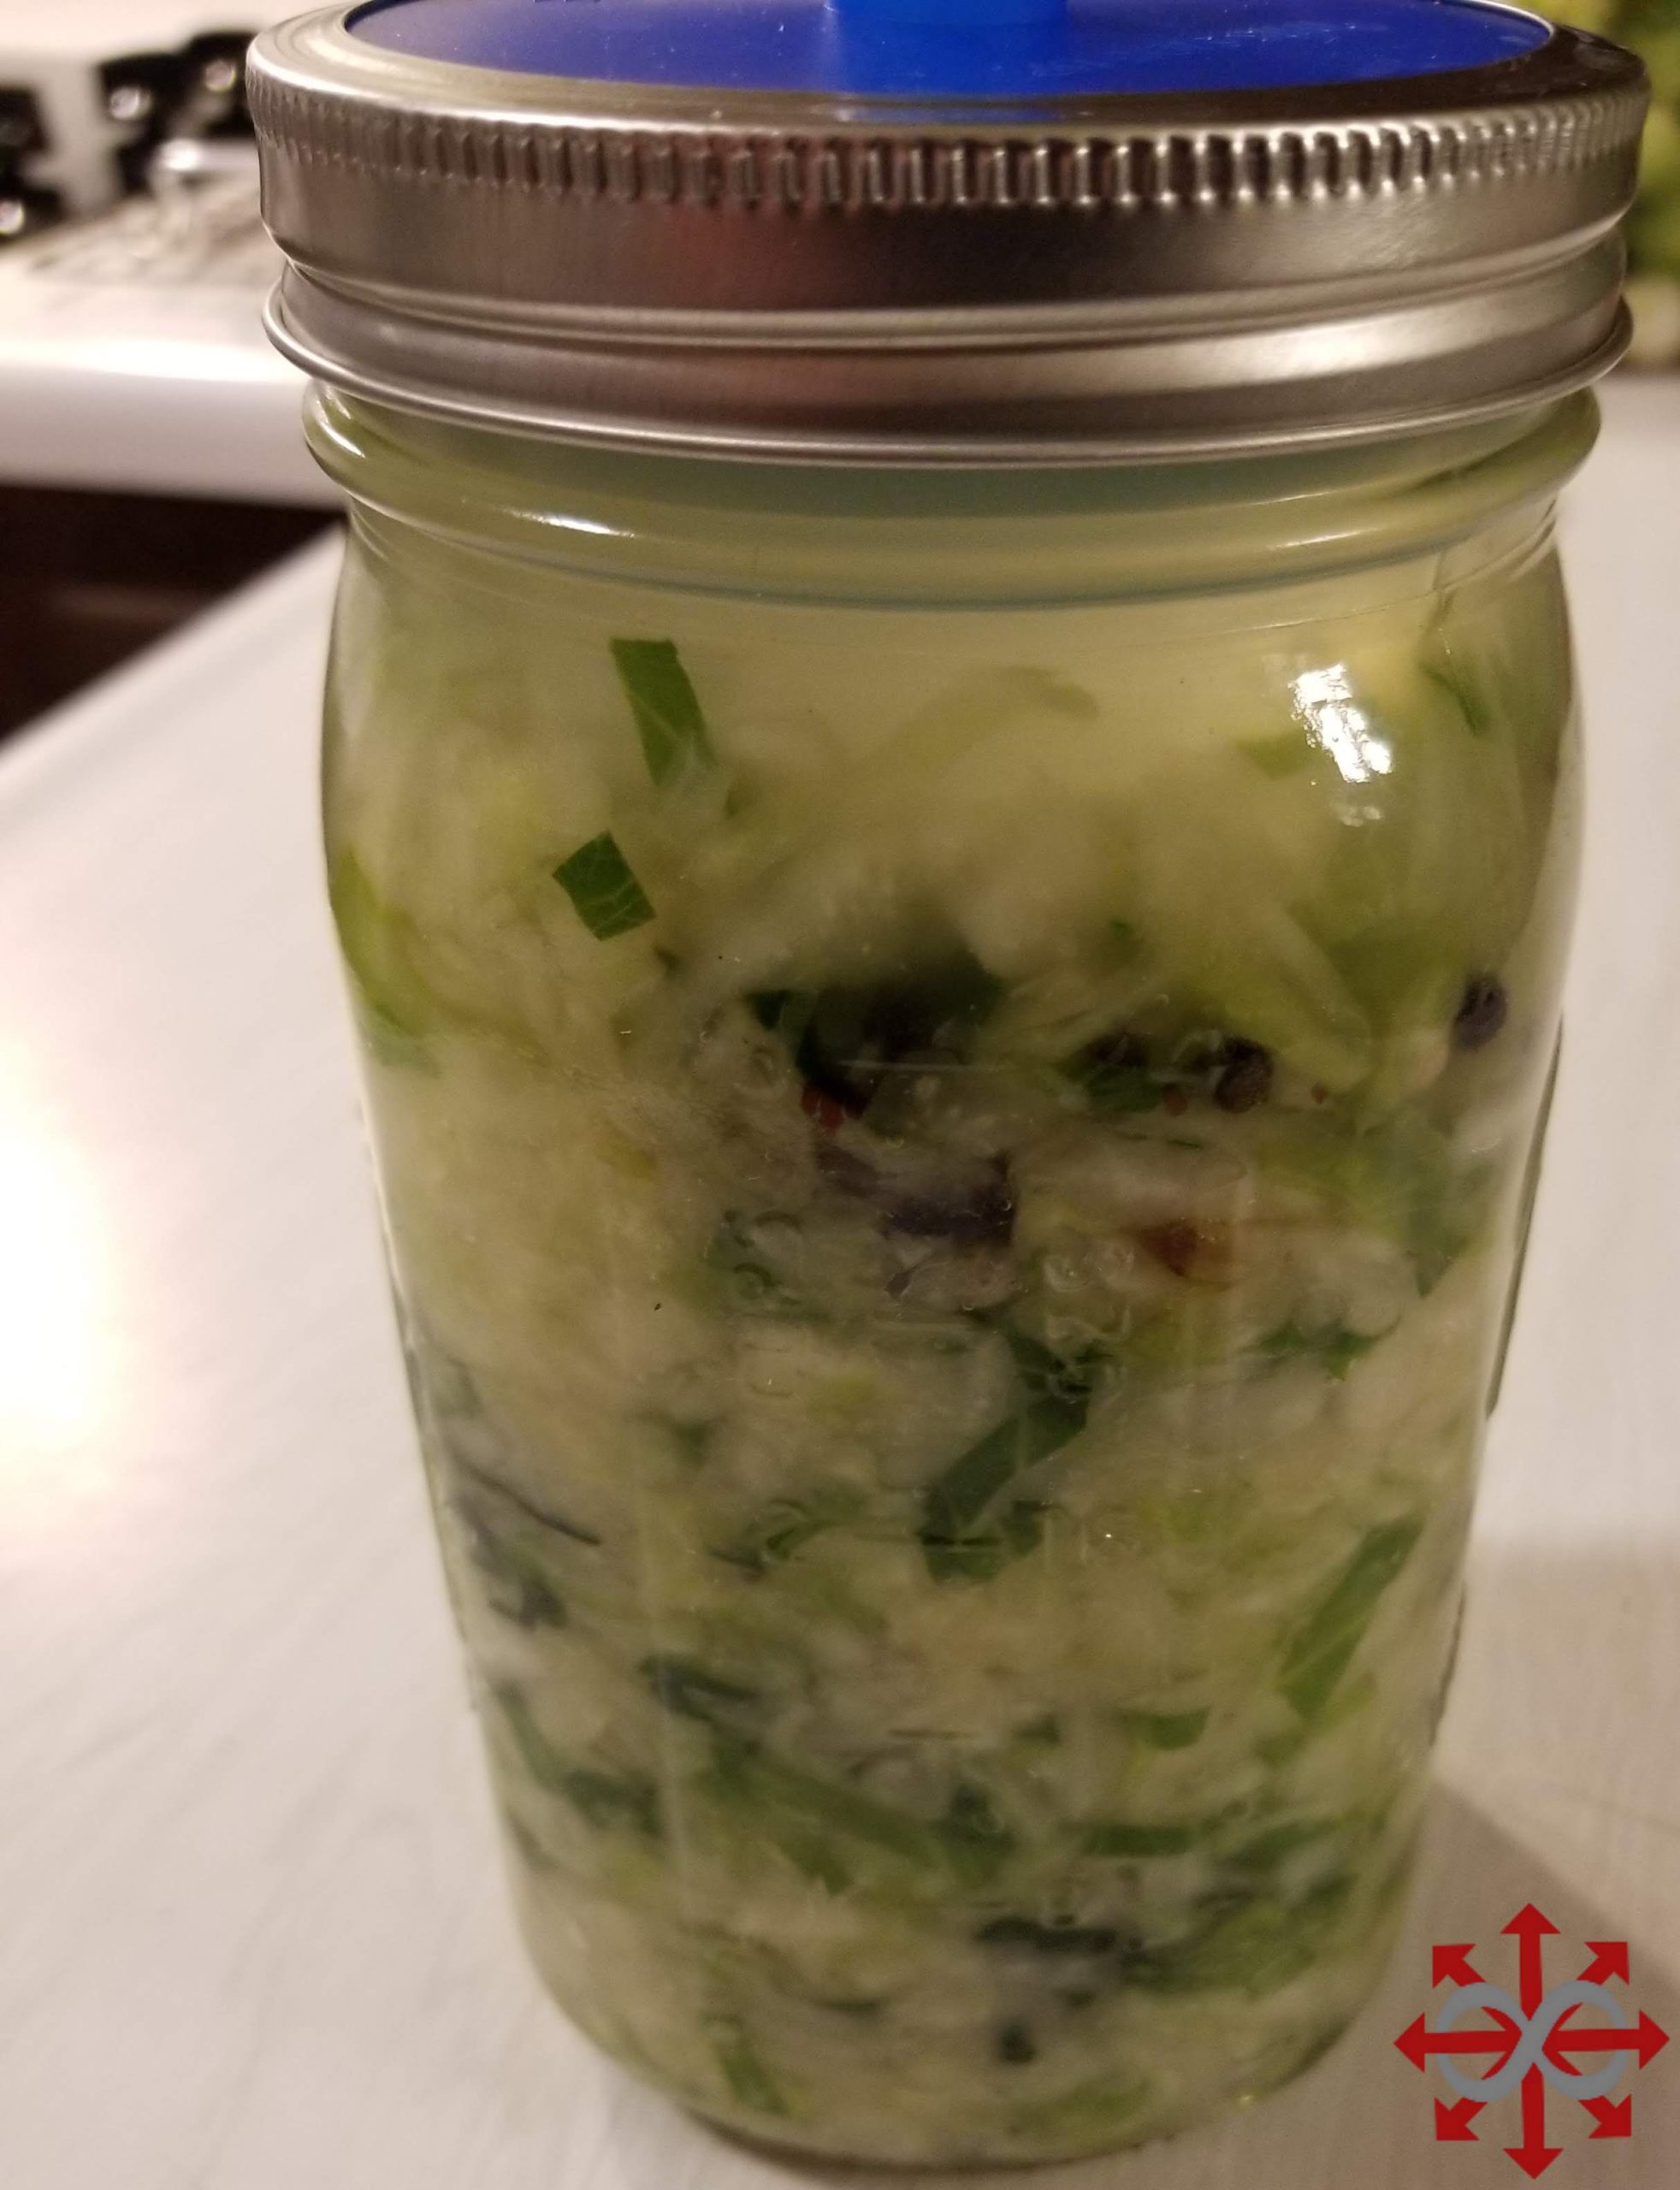
There are many different versions that you can experiment with and make your own. Below is an Indian flavored sauerkraut that is wonderful! It has :
Garlic, onion, turmeric, and Garam Masala, caraway seeds, celery seed, and black peppercorns.

Disclaimer: The product links on this page are Amazon affiliate links.
If, by some amazing happenstance you find yourself motivated to buy the item, I will receive a few cents from Amazon but I only allow ads for products that I actually, personally use.
The facts expressed here belong to everybody, the opinions to me. The distinction is yours to draw…
This book below is amazing and considered to be the best work on home fermentation!

Your internet site has exceptional material. I bookmarked the website